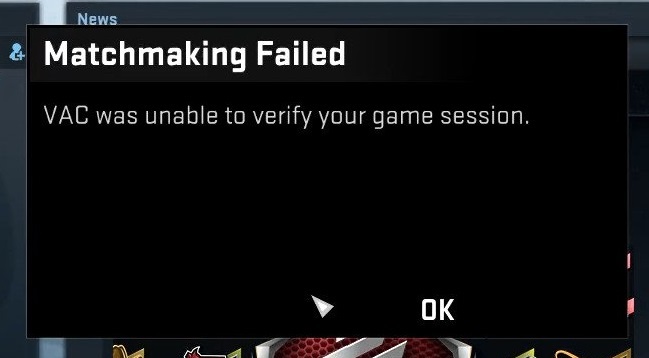
VAC stands for the Valve Anti-Cheat System, released by Valve in 2002. The main task of VAC is detecting the cheats or hacks installed on users’ computers. Any variation to a game by one player to gain the advantage over another player is considered a cheat or hack. If VAC secured server finds any cheat or hacks from users’ computers, it bans the user from playing games on VAC secured server in the future. Even if you have done nothing wrong and facing VAC Unable to Verify Game Session error, then there is chances of a problem with the configuration of the files.
10 Ways to Fix VAC Unable to Verify Game Session Error
1. Running Steam as Administrator
The first method to fix VAC was unable to verify the game session error is Running Steam as Administrator. Steam is a digital distribution platform, provides various services like multiplayer gaming, social networking, installation, and automatic updating of games on multiple computers to its users, which is developed by the Valve Corporation.
First of all, you have to check that steam has administrator access on your computer or not, because by default, steam doesn’t have full administrative access. If steam doesn’t have full administrator access, follow these steps to give administrative access.
Step 1: Click on the Start Menu and enter the Steam.
Step 2: Right-click on steam in the app listing, then right-click on the menu sub-menu and click on the Run as administrator option.
If you have UAC enabled, Window will ask you for permission to make changes in your P.C. Click on Yes for permission.
You can also follow another method to give Steam the administrator access.
Keep this thing in mind that your account has administrator privileges to follow these steps.
Step 1: Navigate to your steam folder (by default, C: Program Files (X86)/Steam).
Step 2: Right-click on the steam.exe and select properties.
Step 3: Click on the Compatibility tab on the top side of the dialog box.
Step 4: Click on Run this Program as an Administrator.
Step 5: The last step is to click on the Ok button.
2. Verifying integrity of games and repairing library
Many times it happens that your steam game does not work properly, crash randomly and show some error, maybe because of the huge and corrupt files. To fix VAC was unable to verify the game session problem, you can use the troubleshooting method, which is Verifying the integrity of game files.
Step 1: Restart your P.C. and launch Steam client.
Step 2: Navigate to the Library section, which you will find at the top, which will show you the list of games.
Step 3: Right Click on the game from which you are having an issue and select properties.
Step 4: Under the property box, select Local files.
Step 5: In the end, select verify the integrity of game files.
3. Repairing Steam Client
You can try the Repairing Steam Client method to fix your error if the above methods did not work for you. This method can be done with the help of Windows Command Prompt. You have to follow the below steps to successfully done this method.
Step 1: Open the Windows search box by pressing Windows +S.
Step 2: Type “cmd” in the box.
Step 3: Command Prompt option will be displayed on your screen.
Step 4: Right-click on Command Prompt and select Run as administrator.
Step 5: In the Command prompt type:
"C:\Program Files (x86)\Steam\bin\SteamService.exe" /repair
Step 6: Then press Enter.
Step 7: Wait for few seconds to complete this process.
4. Power Cycling Your Computer
Power cycling is a basic troubleshooting technique that will fix your problem. Power cycling is the act of turning off your computer, then turn it back on. Often, a Computer becomes unresponsive due to the problem in the RAM (Random Access Memory). Running a power cycle clears the RAM and reinitializes its set of configuration parameters.
Step 1: Turn off your device; you can do this by going through Start Menu or press the Power Button for 1-2 minutes.
Step 2: Unplug your device and remove all wires from it.
Step 3: Wait for few minutes.
Step 4: Plug in the device and Turn on your device.
5. Ending Steam Service
Sometimes, Steam Service runs in the background, which creates glitches and errors to perform the task. Ending Steam Service is another solution that you can perform to fix your problem. To disable the Steam Service in the background, you have to follow the steps mentioned below.
Step 1: Open the Run Prompt by pressing Windows + R.
Step 2: Type “Taskmgr” in the box and click OK.
Step 3: Click on the Processes tab on the top left side of the screen.
Step 4: List of the Program will open; select Steam Service from it.
Step 5: Right-click on the Steam Service and click on the End Task.
Step 6: Lastly, close the Task Manager tab.
6. Copying DLL files
DLL stands for Dynamic Link Library. DLL files are the binary files that consist of executable code, machine code, and resources like images, etc. If we talk about the Steam Service DLL files, there are two types of dll files on your device, one in the Program Files and another one in the Steam installation directory.
When your steam service dll files differ from each other, it creates in functioning. The solution to VAC was unable to verify the game session problem is copying DLL files. The steps are mentioned below to copy the dll file.
Step 1: Navigate to your Steam Installation Directory (C> Program Files (X86)> Steam> Bin) and find the file called Steamservice.dll
Step 2: Now, Right-click on it and select the Copy button or directly press Ctrl + C.
Step 3: After this, navigate to this location:
C>Program Files (x86)>Common Files> Steam
Step 4: Paste the Copied files in this location and select the Replace option.
Step 5: Launch Steam and start your game again.
7. Deleting Temporary Files
One accessible way to fix VAC was unable to verify the game session problem is to delete all temporary files of your system. Temporary files are nothing but files that your operating system and application only needed to exist temporarily while in use.
Sometimes, programs and applications store temporary files on your hard drive. Over time, they capture a significant amount of your disk’s storage. Temporary files do not only capture disk storage but also reduce computer efficiency.
To delete temporary files, follow these steps:
Step 1: Launch the Run program by pressing Windows + R.
Step 2: Enter the “%temp%” in the box and click OK.
Step 3: Press Ctrl + A to select all the temporary files.
Step 4: Press DELETE on your keyboard.
Step 5: Click YES to confirm.
Step 6: All the temporary files will be deleted.
8. Performing a File Repair
Are you still dealing with the issue after trying everything? Then, it’s possible that some important system files in your computer are corrupted. To fix this issue, you have to Repair System file. This can be done by the SFC tool or by giving some command in the Run Prompt.
By using the SFC tool:
Step 1: First of all, log out from your Steam account.
Step 2: Open the Windows search box by pressing Windows + S.
Step 3: Type “cmd” in the search box.
Step 4: Right-click on the Command Prompt and select Run as Administrator.
Step 5: Execute the repair command:
C:\Windows\System32>sfc /scannow
Step 6: Press Enter.
Step 7: Reboot your PC and check for the problem.
By entering the Commands:
Step 1: Open the Run Prompt by pressing Windows + R.
Step 2: Type the following command in the box:
"C:\Program Files (x86)\Steam\bin\SteamService.exe" /repair
Step 3: Wait for few seconds and check the issue is solved or not.
Step 4: If the problem is still not solved, navigate to the following location:
C:\Program Files (x86)\Steam\SteamApps\common\Counter-Strike Global Offensive\csgo\maps\workshop
Step 5: Press Ctrl + A and press Delete.
Step 6: Now navigate to the following location
C:\Program Files (x86)\Steam\SteamApps\common\Counter-Strike Global Offensive\csgo\maps\graphs\workshop
Step 7: Again press Ctrl + A to select all and press Delete.
Step 8: Launch Steam and let it download the missing files.
Step 9: If the problem is still not solved, open Run Prompt by pressing Windows + R.
Step 10: Type “cmd” in the open box.
Step 11: Press “Shift + Ctrl + Enter” to grant administrative privilege.
Step 12: Execute this command:
start steam://flushconfig
ipconfig /release
ipconfig /renew
Step 13: Press Enter.
Step 14: If all this process still has not solved your problem, then type the following command in the Command Prompt, but this will disable some of your PC security features.
bcdedit.exe /set {current} nx OptIn
9. Checking for Background Service/Tasks:
If you are running virtualization software or VPN/Proxy in the background, then there are chances that it is the main cause of ‘Unable to verify the game session’. Here’s are the following step to stop the background conflict:
Step 1: Open the Run Prompt by pressing Windows + R.
Step 2: Type “Services.msc” in the box and click Ok to open the Service Management Window.
Step 3: Right-click on any of the following services and select disable from the context menu.
VMnetDHCP
VMUSBArbService
VMware NAT Service
VMwareHostd
VMAuthdService
hshld
Step 4: Now, Press “Ctrl + Alt + Del” to open the Menu.
Step 5: From the menu, select Task Manager.
Step 6: In the Task Manager, end the following process if you see them:
hydra.exe
hsswd.exe
hsscp.exe
vmware.exe
10. Updating Windows
The final option you can apply is updating your Windows Operating System. When you update your PC, your PC will have the latest features, bug fixes, and more security tools. You can easily update windows by following the below-mentioned step.
Step 1: Open the Search box by pressing Windows + S.
Step 2: In the search box type Settings.
Step 3: Select Update & Security from the available options.
Step 4: Now, choose Windows Update from the sidebar.
Step 5: Click on the check for updates.
Final Words
We hope you find this article helpful. Please go through the complete article to get a better understanding of how to fix VAC was unable to verify the game session error. This article contains the in-depth procedures you should follow to get the desirable results.